Come back here every day this week for the links and information you’ll need for that day.
**This post contains affiliate links, which means if you click on a link and make a purchase, I may make a small commission at no extra cost to you**
If you like what you see in these first 4 days, click here to purchase the entire month with all supporting printables.
Note: If you would like to subscribe to this website, you will get a one-time offer to get this challenge at the lowest price you will ever see. Just wanted to let you know 😘 If you like good deals, scroll to the bottom to sign up!
Day 1
1 – Locate & measure your gas shut off
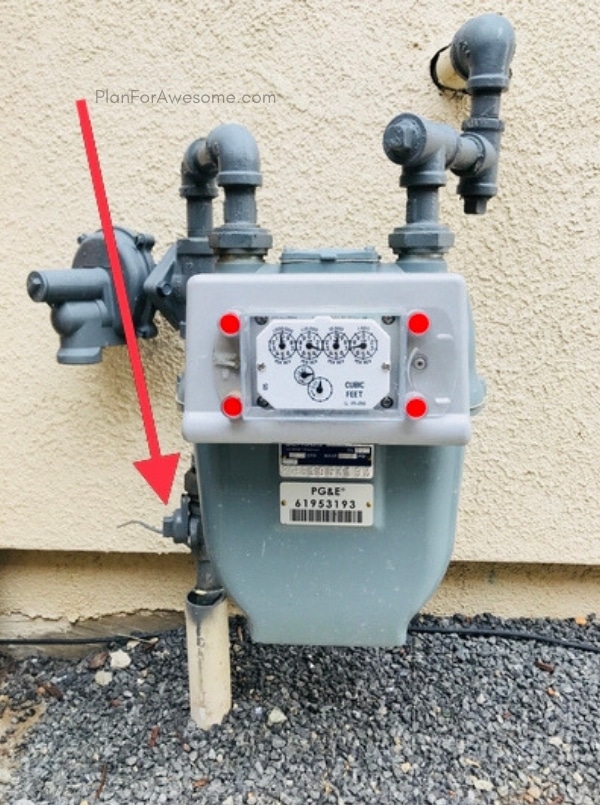
Your gas meter will likely be somewhere in your front/ side yard, in front of your gate; the gas company needs to have access to it, so it shouldn’t be tucked away in your backyard. Ours is on the side of our front yard.
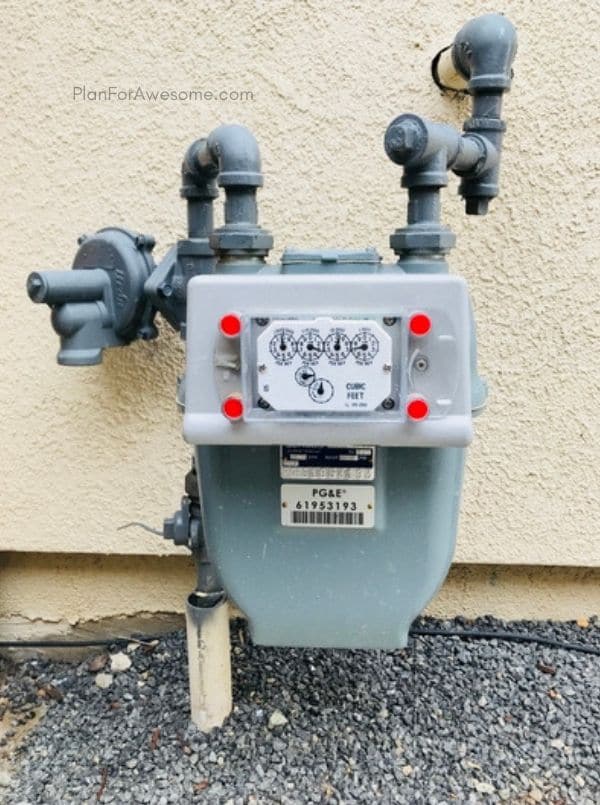
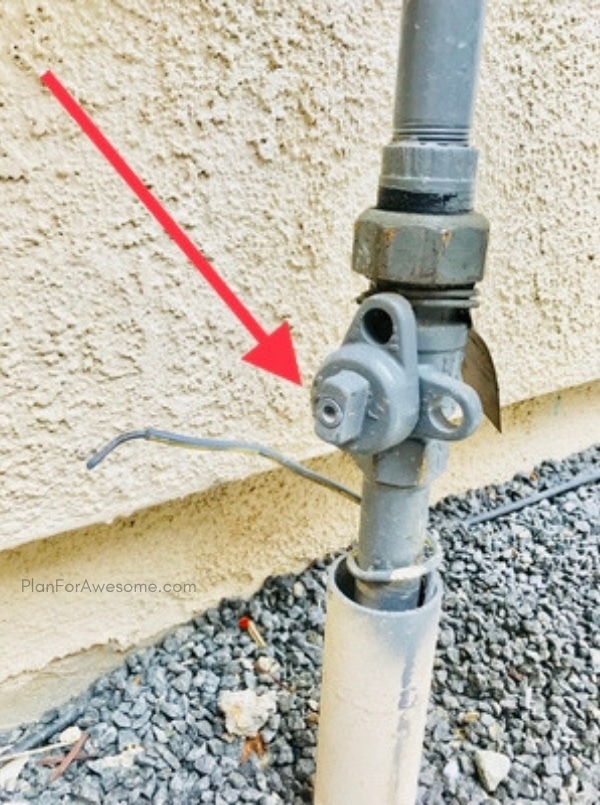
Measure the little knob on the side of the meter. This is what you turn, in order to shut off your gas. You will need the measurement to make sure the shut off tool that you order will fit around the valve.
2 – Locate & measure your water shut off
Warm Climate
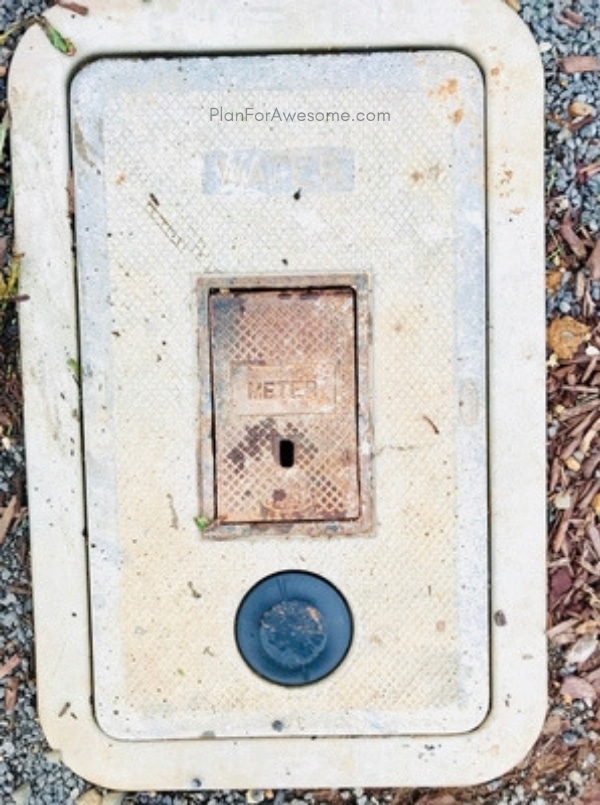
If you live in a warm climate, the water shut off is under that big cement rectangle in your front yard.
Cold Climate
If you live in colder climates, the water shut off is probably either in your crawl space or your basement (if your basement is finished, check the closets in the bedrooms).
If it’s in the basement, it will probably be either in the wall or on the water pipe leading to the water heater.
What to Measure
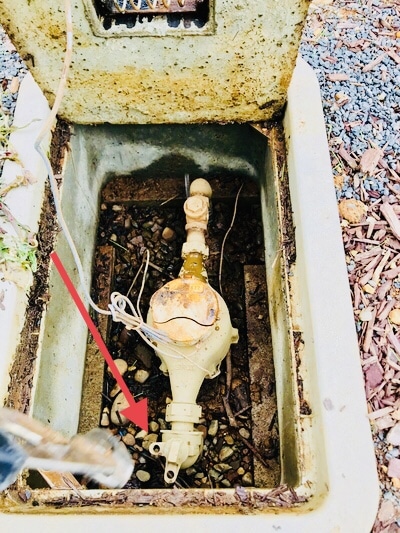
Your water shut off may have a little handle already that you just turn, in which case, you don’t need to take measurements.
If it looks like the picture below, measure the knob.
3 – Purchase a utility shut off tool, making sure it will fit the valves on your utilities.
This is the shutoff tool we have (affiliate link) and it’s under $20. It’s a fairly universal tool, designed to work for standard gas and water meters. Having said that, it does not work for every single gas and water meter. Check the measurements you took today and make sure this tool will fit around your valves.
The hole for the gas shut off on this particular tool is 1.5 by .5 inches.
The notch that is used for the water shut off on this tool, has a width of 5/8 inches.
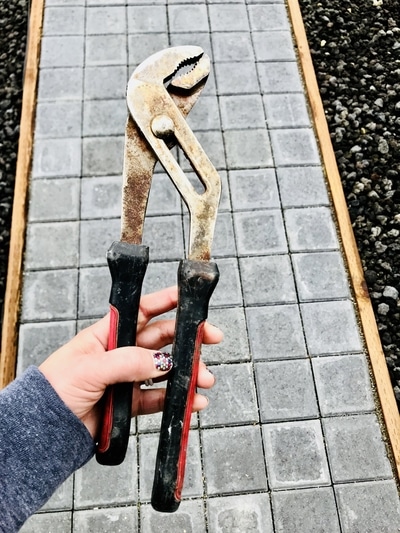
If this shutoff tool is the wrong size, you can get away with a pair of heavy-duty pliers. Whichever way you go, make sure you purchase a tool specifically for this. Even if you already have a pair of large pliers at your house, get another one dedicated specifically for shutting off your utilities, because you are going to need to store these in a different place from the rest of your tools.
Day 2
1 – Purchase a fire escape ladder for each room of the upper level(s) of your home, if applicable.
This is obviously only something you need if you live in a multi-level home/building. I haven’t had to worry about this until moving to our current house. It’s something you may not have thought of, that could save lives!!!
The exact ladder that we have can be found HERE on Amazon (affiliate link). Be sure to get the correct length…this link is for a ladder for a 2 story home. There is an option for a 3 story ladder on this link as well.
2 – Purchase a fire extinguisher for each level of your home at a minimum (especially your kitchen!)
There are several types of fire extinguishers.
- A – For use with ordinary materials like cloth, wood, and paper
- B – For use with combustible and flammable liquids like grease, gasoline, oil, and oil-based paints
- C – For use with electrical equipment like appliances, tools, or other equipment that is plugged in
- D – For use with flammable metals
- K – For use with vegetable oils, animal oils, and fats in cooking appliances
There are multipurpose fire extinguishers (affiliate link) that are labeled “B-C” or “A-B-C.” This is the type I would recommend to get for your home. At the very least, you should have one on each level of your home. DEFINITELY IN THE KITCHEN!
Day 3
1 – Purchase a thermometer to keep in each fridge and each freezer you have.
Why on earth is this part of an emergency preparedness challenge?!
Because if you experience a power outage that is longer than 4 hours, there is a good chance your refrigerated food will not be safe to eat afterward.
If the power is out for longer than a couple days, the food in your freezer will likely need to be thrown out. Having a thermometer in each will allow you to know the temperature inside your fridge and freezer at the time power is restored.
You will want to “discard any perishable food (such as meat, poultry, fish, eggs, or leftovers) that has been at temperatures above 40° F for 2 hours or more (or 1 hour if temperatures are above 90º F).”(https://www.fda.gov/media/72124/download)
Be sure to get a thermometer for each fridge and freezer that you own. Don’t forget the ones in the garage!
This 4-pack (affiliate link) is a great deal and will cover a fridge/freezer combo in your house as well as one in the garage (if you have one out there). I like these ones because they are a nice size, easy to read, and have a stand to stand up on a shelf and a hook to hook them on a bar. The only downside is these require batteries, and batteries need to be replaced occasionally…I have not loved that part of this one that we have.
If you are looking for a battery-free option, this one (affiliate link) is a good choice – we have this one in our garage fridge.
2 – Purchase a manual can opener if yours is electric.
Again, why is THIS part of an emergency preparedness challenge?!
Because we are getting ready for our POWER OUTAGE day in our last week of the month. You want to be sure you have a manual can opener (or two) in your home at all times.
*Sidenote: even if you have one of these already, getting a spare can opener is a good idea, since they can go dull. If you have long term food storage in #10 cans, I would definitely recommend getting a spare can opener or two. We aren’t discussing long term food storage in this challenge, but I thought it was worth mentioning while we’re on the can opener topic.
This is my favorite manual can opener (affiliate link).
Day 4
1 – Round up all flashlights and lanterns you have in your home.
2 – Test them all and replace batteries as needed.
3 – Purchase enough flashlights/lanterns to have a minimum of one per room.
Figure out how many more flashlights/lanterns you want to have in your home for emergencies/power outages. I would recommend a minimum of one per room in your home.
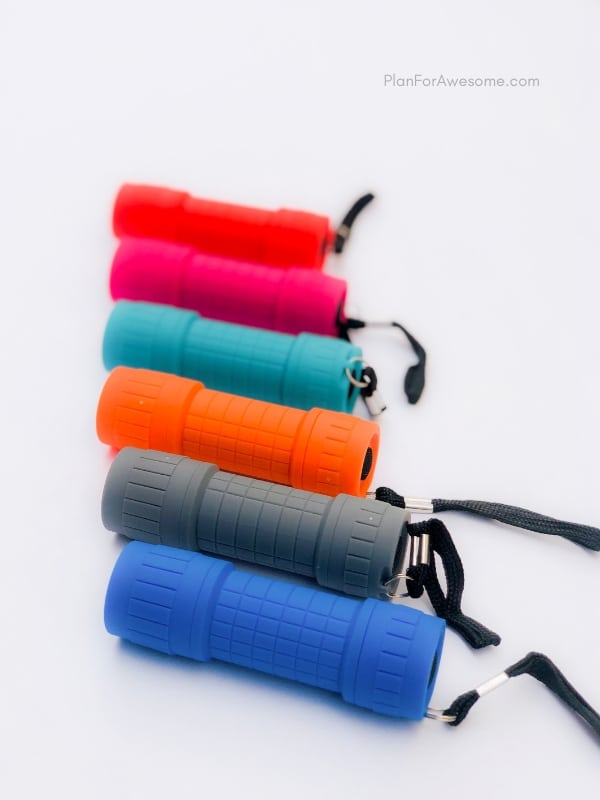
I like this variety pack of flashlights (affiliate link) because you get 6 flashlights for $14.99. Each flashlight is a different color, making it fun for kids to pick their color and keep track of their very own flashlight. I also like their small size, making it convenient to keep them in a drawer, next to a bed, etc. We bought two of these 6-packs, and took care of each kid having their own flashlight in their rooms (under/next to their beds), as well as one for each family member in our kitchen/living room area.
If you are interested in a hands-free source of direct light, headlamps are a great option. This is my favorite pick for headlamps (affiliate link). It’s comfy, waterproof, and as stylish as possible, given what it is.

Lanterns are worth their weight in gold during a power outage. We have these lanterns and love them (affiliate link). There are lots of different brands out there, but they essentially do the same thing. They are small, inexpensive, only take a few AA batteries, and they even have convenient handles on the top that can also be used as hooks to hang them up. They’re also magnetized on the bottom (we store ours on the side of our fridge).
4 – Purchase all batteries needed to have backups for all flashlights/lanterns.
All of these flashlights and lanterns are only going to be useful if you have batteries for them! DO NOT OVERLOOK THE BATTERIES!!!! I buy our batteries at Costco, so if you’re like me, be sure to snag a couple packs on your next Costco run!! Go put batteries on your Costco (or other store) shopping list RIGHT NOW!
Day 5
Today is a printing day. Don’t worry about filling anything out on any of these things you are printing off. Just get the printing done. I recommend printing all of these on white card stock (affiliate link). You can use normal paper, but I just love the feel of card stock and it helps things last longer. However, if you plan on laminating these or putting them in sheet protectors, regular paper should be just fine.
PS – if you are looking for an awesome laminator that has literally lasted me over 10 years, this is it (affiliate link).
One of the best purchases I have ever made!
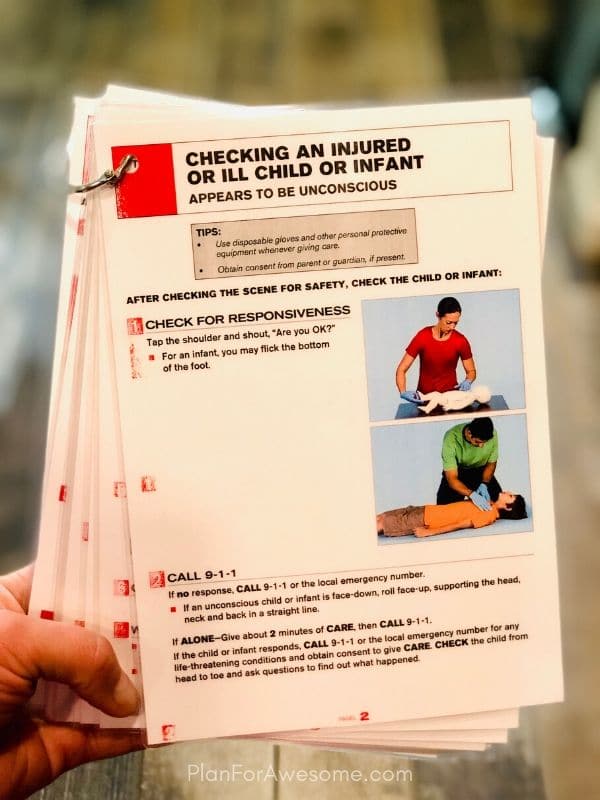
1 – Print out CPR instructions. Put them in a sheet protector or laminate them and hang them somewhere in your kitchen/command center.
If you don’t mind a few pages, the Red Cross has a few that are excellent. They are listed HERE on this webpage if you scroll down a little bit.
If you MUST have it all on one page, this is a good one. However…I will say, while this seems self explanatory now, I feel like the Red Cross ones are much more effective with the visual of the pictures. If you are freaking out in an emergency situation (or one of your kids or a babysitter is freaking out trying to administer CPR), I feel like the Red Cross ones may be more helpful.
Just consider the dynamics in your home, and do what’s best for you. I decided to go with the Red Cross ones. I laminated each page and attached them all together with a little ring that keeps them together. That way I didn’t have to sacrifice information for space necessarily.
2 – Print out the remaining printables we will be using throughout the next 3 weeks!
To access these printables, you will need to purchase the rest of the challenge HERE.
If you liked these first 4 days, click here to purchase the entire month with all supporting printables. The majority of the remaining days in the challenge are FREE, but SO IMPORTANT. My favorite is Week 4, where you cover one topic per day with your entire family, preparing all ages for a variety of emergencies. Included is a printable for each day with discussion points so you don’t forget anything!
Note: If you would like to subscribe to this website, you will get a one-time offer immediately after you click submit, to get this challenge at the lowest price you will ever see. Just wanted to let you know 😘
To return to the MAIN EMERGENCY PREPAREDNESS CHALLENGE FOR FAMILIES PAGE, click here.


