Simplify Your Family's Emergency Preparedness

DIY First Aid Kit for Families

72 hour kits - part 7

diy first aid kit in a tackle box.

**This post contains affiliate links, which means if you click on a link and make a purchase, I may make a small commission at no extra cost to you.

It can be tempting to just buy a pre-made kit from the store. And if that’s all you can manage right now, then by all means go get one! But, I promise you will be SO happy to have a first aid kit that actually suits your family. 


Keep reading and you’ll find some super helpful tips for a DIY first aid kit for your family. I’ve even done the research and am giving you some medical product comparisons & links.

A first aid kit is a key component of your 72 hour kits. If you're looking for the most efficient way to put it all together, then I highly recommend 72 hour kits for families. The video course that walks you through every step of the process.

Why have a DIY first aid kit in your home?

Having a first aid kit in your home is SO IMPORTANT for so many different situations. I’m talking about a little more than a box of band-aids and a tube of Neosporin, although those things are great. I’m talking about all the other stuff. The alcohol pads to clean cuts with, the gauze and tape, ACE wraps, gloves, splints, trauma pads, etc.


I realize that if something requires more than a band-aid, there’s a good chance you’ll be going to the Emergency Room. And they have all that stuff, so why do we need it in our homes?


Because we should be prepared for emergencies. What if something is so severe that it can’t wait for the ER? What if someone gets injured during a major earthquake (or other natural disaster), and it is impossible for you to get to the ER?


It is ALWAYS a good idea to be prepared with a few basic things, just in case. I’d rather spend a few bucks on Amazon and know that we are prepared and equipped to handle a few things on our own if the need arises.

Where should you keep your first aid kit?

You should keep your first aid kit somewhere that is:


  • Cool
  • Dry
  • Easily accessible for all family members

The cool and dry part is to keep all of the stuff inside the kit functioning how it should. You don’t want things to lose their stick or dry out or lose their potency due to temperature or humidity.


Keeping your kit in an easily accessible location in your home is SO DANG IMPORTANT! If you have the need to access anything in this kit, chances are you will be in a BIG HURRY! You don’t want to have to dig around looking for it, or have to move a bunch of stuff to get to it.


You also want to make sure all family members can get to it. If a child is severely injured, you want to be able to send another child to get the first aid kit for you! Also don’t rule out the possibility that it may be you who is the injured one and you may be unable to get it.

checklist of things to include in diy first aid kit.

Some tips before you get started on your DIY first aid kit

EXPIRATION DATES:

Just as I suggested with your 72-Hour Kits, it is really nice to have a list of expiration dates of all the items in your kit handy. I have included a space for you to keep track of expiration dates on the printable list of items. Just jot down the item and its expiration date as you collect things and put them in your kit. That way you can check your list periodically and replace things as needed, without having to empty out your whole kit to look at all the expiration dates.


BACKUP ITEMS:

To keep the size of your first aid kit down, you will only want to put a few of each item in your kit. However, it often makes sense to buy things in bigger quantities. I have an overflow tote where I keep all of the extras of things from our first aid kit. That way I don’t have to cram every single bandage or alcohol wipe into its designated compartment. I have plenty for one (or more) incident(s) in our actual kit, and then I can restock our first aid kit from our backup tote.

What should you pack your DIY first aid kit in?

I have struggled and struggled with this one. I am still in shock that I haven’t been able to find a box that does exactly what I want.


I had ours in a duffle bag for years, but I hated how unorganized it was. I often resorted to dumping the whole bag out all over the living room floor to find what I needed. That was not productive.


All the boxes I’ve found that are specifically for first aid kits are too small, or don’t have enough compartments. They just don’t hold enough stuff! I also don’t like how a lot of them have a removable lid and/or tray – I want it all to be contained in one thing. I don’t want any loose lids or loose pull-out compartments.


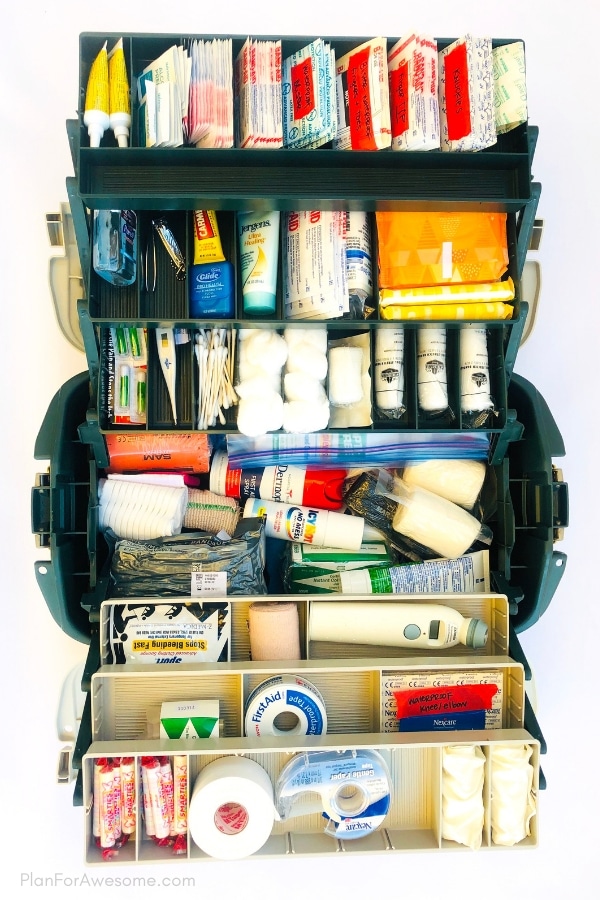
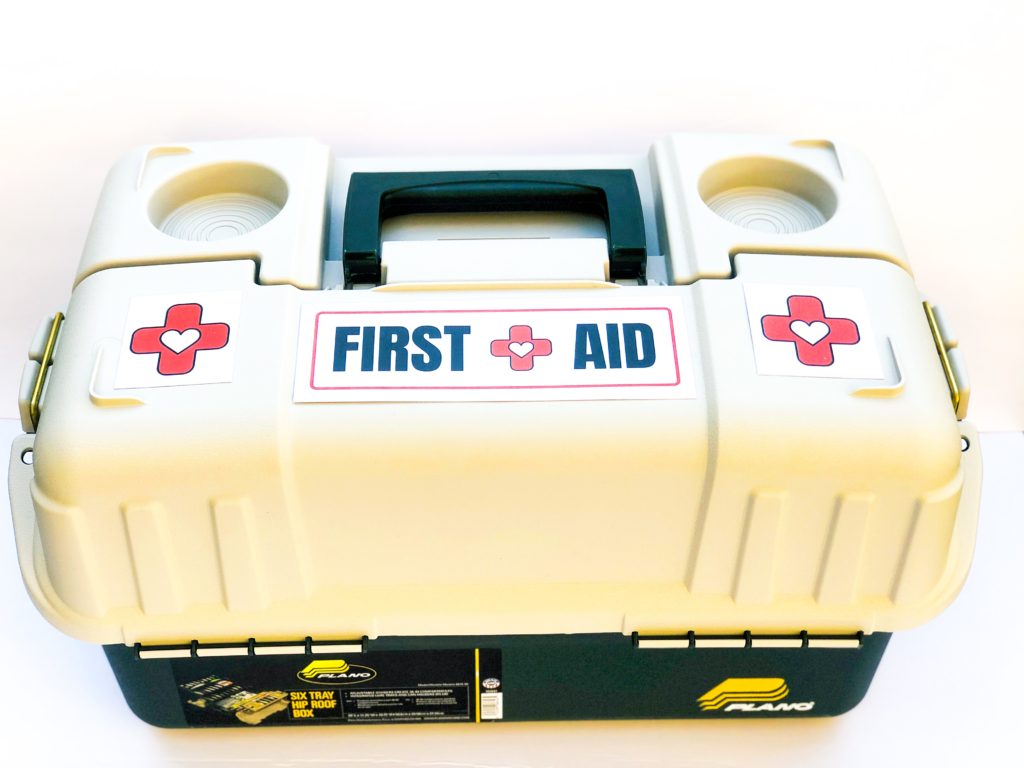
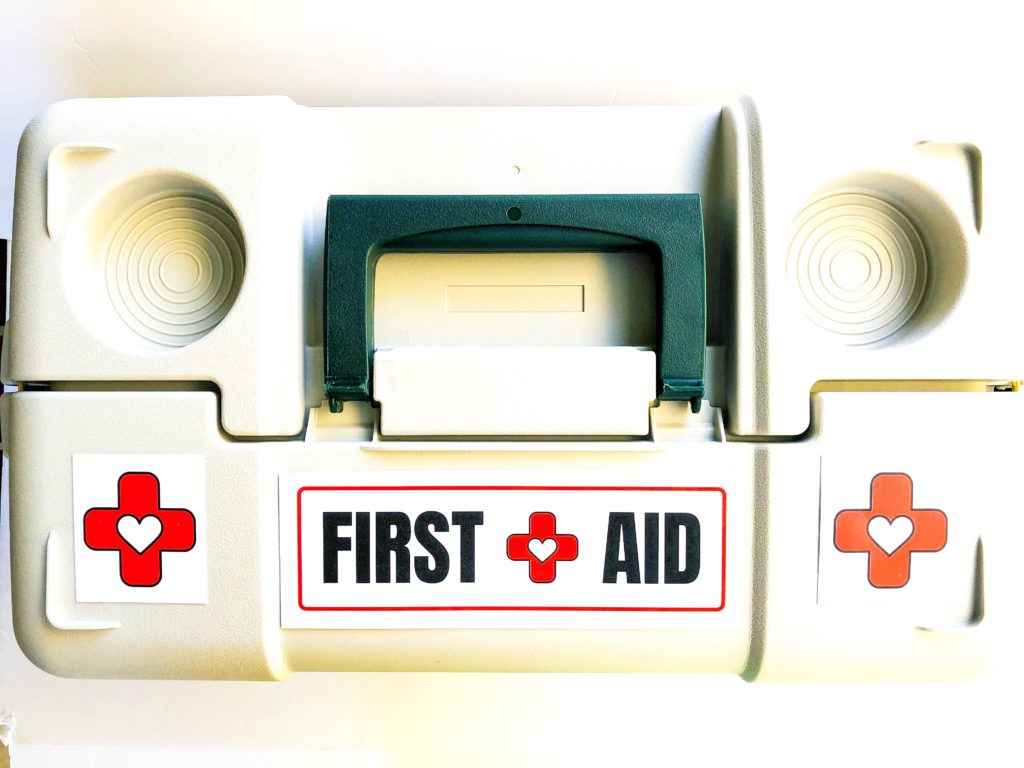
I resisted the tackle box idea for years, but finally succumbed to it, and I have been pleasantly surprised. It’s not perfect, but it’s the best thing I’ve used thus far. The teeny tiny compartments are definitely annoying, but I found a way to make them work, and I don’t have too many things in the big bottom section.


Sure, I’d like for the big bottom part to feel a little more organized, but there’s only about 10 items in that section, so there’s not much to dig through when it comes to finding something down there.


I actually ordered 3 different tackle boxes on Amazon so I could compare them and narrow in on what type worked best.

first aid kit tackle box.

List of items to include in your home DIY first aid kit

No one can tell you exactly what to put in YOUR first aid kit. But here is a list of things that I am comfortable with having in mine. These are the things that I feel are worth the money and make me feel better prepared to handle emergency situations with all of these humans in my family.


  • Hand Sanitizer
  • Gloves
  • Assorted Band-Aids including Knuckle Band-Aids – these things are so cool! Do you have them? I use them all the time now.
  • Neosporin
  • Steri-Strips – these function like butterfly band-aids.
  • Alcohol Pads or Iodine Wipes
  • Liquid Bandage (or superglue)
  • Contact Solution – this is basically just a saline solution and it comes out fast. This is a great way to clean out a wound quickly!
  • Cotton Balls / Q-Tips
  • Scissors – at the very least, a pair of normal scissors is essential. But if you are going to buy a pair of scissors, Trauma Shears are great because they act as normal scissors do, but they also have the blunt, rounded tip to be able to cut clothes off quickly in an emergency.
  • Nail Clippers & Tweezers
  • Floss
  • Gauze
  • Eye Pad
  • Coband (Self-Adherent Cohesive Tape) – this is the stuff they wrap around your arm when you give blood to keep the cotton ball in place. And this link is to a pack with assorted fun colors 🙂 I’ve never thought to get some of this for my house, but I will say, it’s been a convenient little thing to have here! Instead of using a big (and expensive, since the bigger the band-aid, the bigger the cost) band-aid, put some gauze on it, wrap some of this around it, and you’re done. Not only is this a cheaper option, but then you don’t have to deal with trying to get a band-aid to stick in an awkward place, and you don’t have to deal with ripping the band-aid off. Kids love the fun colors, so this option is just as fun as putting a Star Wars band-aid on their owies!
  • Dermoplast – antiseptic / pain relief spray
  • Burn Cream / Burn Jel
  • Bee (and other) Sting Kit
  • Bug Spray
  • Anti-Itch
  • Moleskin
  • Icy Hot
  • Plastic Bag – for trash or for puking (I bought a pack of these and split them between our first aid kits, our cars, our 72-hour kits, and our travel tote.
  • Lollipops – for the victim, of course
  • First Aid Book/Manual
  • Instant Cold Packs
  • ACE Wraps
  • Sam Splint – these things are awesome. They are sturdy and pliable and can be bent to conform to any arm or leg you would need to build a splint for. You can roll them up and store them in a small, compact space, and they are re-usable too! For $10, I love the versatility of this!
  • Sling – I haven’t purchased any slings – I have just always kept whatever stuff my kids get from the doctor over the years. We have some crutches, a boot, a few slings, a splint, etc. ?
  • Popsicle Sticks – for finger splints (Standard or Jumbo)
  • CPR Mask – this isn’t just so you don’t get cooties from the person you are doing CPR on. These actually have a more functional purpose that most people don’t realize, and make the rescue breaths you are giving much more effective. These little guys create a seal around the recipient’s mouth that is really hard to do effectively with your own mouth. They also have a handy valve that prevents anything from going into your mouth (including vomit). So while these are not necessary, they are great to have in your back pocket, should the situation require CPR.
  • Compression Bandage – this is pretty much like gauze and an Ace Bandage all in one. If you have a large wound you need to cover fast, this is my favorite option. This link has a 4″ option or 6″ option. If only getting one of the sizes, I would go with the 6″ because it would cover a larger wound.
  • Celox – this is a great and safe way to stop the bleeding in an emergency
  • Diapers/Pads – these are designed to absorb fluids! And they are a lot cheaper than trauma pads.
  • Tampons
  • Vent Chest Seal – I know this one may be a little over-the-top. But when I was researching first-aid kits, I came across this, and then my mind went to the worst. What if someone was shot or stabbed? This could save their life. This little contraption prevents airflow into the chest cavity during inspiration while allowing air to escape through the vent channels during exhalation. Kind of amazing. I just decided that for under $20, I’d like to have this in my kit. Just in case.
  • Glucose Tabs
  • Thermometer
  • Acetaminophen
  • Orajel
  • Hydrocortisone
  • Allergy Medicine (like Benadryl)
  • Anti-nausea
  • Anti-diarrheal
  • Cold Meds
  • Antacid
  • Cough Medicine / Drops

Need more help with your 72 hour kits or DIY first aid kit?

I hope this has been helpful to get you started putting together your very own DIY first aid kit for your family.


If you’re ready to tackle 72 hour kits for yourself or your family, be sure to check out the whole blog series:

Part 1 – 72-Hour Kits for Beginners 

Part 2 – 72-Hour Kits for ADULTS – this has a free printable list of things to include in your 72-hour emergency kit (bug out bag).

Part 3 – 72-hour kits for KIDS / BABIES 

Part 4 – 72-Hour Emergency Kits for Pets 

Part 5 – 72-Hour Emergency Kits: GRAB LIST


If you’re looking for more help and support, you might want to check out the Personalized Preparedness membership. By answering a few simple questions, I’ll help you decide where would be a good place to start (or continue) on your emergency preparedness journey.

tablet mockup of personalized preparedness membership menu.

Related Posts:

kids with 72 hour kits and food storage on a trail.

How to Prepare Kids for Emergencies

In order to prepare kids for emergencies, you first need to tackle the obvious – disaster anxiety is real! This post addresses that and gives you resources to help teach your kids about preparedness without scaring them.

Read More »
hands holding a sign.

5 simple things you can do to get your family prepared if you don't have thousands of dollars or hundreds of hours

Receive EXCLUSIVE SUBSCRIBER-ONLY FREE PRINTABLES, INCLUDING "THIS OR THAT EMERGENCY PREPAREDNESS," with 5 things that take 15 minutes or less!

hands holding a sign.

This website uses cookies to ensure you get the best experience.